Monday, 17 October 2016

Cushion Makeup♥*

Cushion foundations are the next biggest thing right now within the beauty community. The first big name I can remember bringing out a cushion foundation was L'Oreal, now every brand are bringing them out, including Lancôme. As well as their foundation, they have also introduced a cushion blush - and this was the first cushion blush I have seen. Fair to say I jumped right in to give it a bash.


Teint Idole Ultra Cushion* - first of all, can we please appreciate how beautiful and elegant the packaging is?! I adore it. I was glad to see you do get a makeup puff with the product, obviously because it's the cushion style. When you lift the compact, you discover the foundation section. I have the shade 015, which is ever so slightly too dark for me, but regardless, the coverage is flawless and the finish is beautiful. It does give quite a high coverage but I reckon that it would be buildable. Although it has quite high coverage, it doesn't look cakey in any way, the only way to describe it has to be airbrushed.


Cushion Blush Subtil* - The concept of a cushion blush had me intrigued. I was afraid in case I would use too much, but after I got the hang of it, I knew what I was doing. As you can see, shade 02 is a beautiful, rosy yet natural blush and it will look beautiful in the colder upcoming months. It blends out like a dream - I apply a small amount with the makeup puff provided then use a damp beauty sponge. I would even say that it would be a good base for under a powder blush. As with the foundation, both require very little product as they are very pigmented.

Although I had never tried cushion makeup products before, my first experience has been interesting yet I must admit, I do really like the products. I do feel I have more confidence using a cushion foundation as opposed to a cushion blush, but if you wear blush on a daily basis, I highly recommend this one as it is easy to get to grips with!

Have you tried any cushion makeup products? What are your opinions on them?

*PR Samples


Monday, 10 October 2016

A Foundation For Oily Skin?♥

Having oily skin and finding a foundation that won't slip and slide around is a bit of a nightmare. I have being paying particular attention to the skin type so that I can buy a foundation just for oily skin. Then I stumbled upon the Maybelline Fit Me! Matte & Poreless. I had heard of it on YouTube and blogs as I believe it was originally released in America first - I knew I had to get my hands on it.

As usual, I bought the palest shade available, and in all honesty, I don't feel it's all that pale. With that aside, the foundation itself is pretty good. As it's in a tube packaging, I only use a small amount and add more if needed - less is more - and can always build more layers up. I ensure to use a primer beneath (mainly out of habit; mainly because of my oily skin), then set it with powder and use a setting spray to lock it in. In terms of lasting, it lasts a fair few hours before I feel I need to apply some extra powder. I have found that on the (rare) warmer days, it will slip off more, however, I won't need to worry about that happening often in Scotland (haha, more like worrying about it dripping with the rain..)

I wouldn't say I'm a fan of it being a tube - I'm always afraid incase I use too much and waste it, I would've liked if it came in a pump style bottle. Personally, I blend it out with a damp beauty sponge, and by using this, it ensures that the foundation doesn't look cakey.

For the price of £5.99, I don't think you can go wrong with this foundation. It isn't orange either, which is good for a pale gal like me. The coverage is quite medium but feels super lightweight at the same time. It is most certainly an everyday foundation.

Have you tried this foundation? What's your opinion on it?


Monday, 3 October 2016

Covershoot Cosmetics♥*

Is there honestly anything more exciting than adding new makeup to your collection? Especially new brands and types of products you don't already own? You could imagine my excitement with regards to trying out Covershoot Cosmetics*. When they got in touch with me, I could hardly knock them back - their products look exciting and their packaging is ace.


Covershoot Cosmetics Brow Kit* - the packaging of this is ever so basic yet I can't help but love the simplicity and sleekness of it. Inside, there are three brow shades, a primer (wax), miniature tweezers and a small brush. I don't use either the tweezers or brush because they're too small but the brow products themselves? Great. The primer is different to any other brow wax I have but I always make sure to brush my brows before applying the powders. The brown shade is ideal for about 2/3 of my eyebrows, and the beige suits the front of my brows just to give a "gradient" effect. However, I don't use the black for my brows, but it would be perfect for an eyeshadow regardless.

Covershoot Cosmetics Contouring* - Never before had I owned a cream contour kit, so I guess it was fair to say I didn't know what to expect from it. I was glad to see that the contour shade was cooler than the bronzer shade so would create a shadow. I used my damp makeup sponge to blend it all out. I really like the natural look that the contour shade gives; the bronzer shade gives the perfect amount of warmth to your complexion; the highlight shade confuses me. I don't quite know what to use it for. I guess maybe concealer or highlighting the high points of your face, but it's not my favourite. Apart from that, I love this kit!


Covershoot Cosmetics Neon Palette* - most certainly the brightest eyeshadow quad I own for sure. I must admit, it is quite intimidating. I wasn't sure if I could pull off ANY of these colours at first, so I thought I'd give it a shot regardless. Not exactly my day to day palette, but ideal for Halloween or any party like that!

Covershoot Cosmetics Smoky Palette* - Greys aren't colours I tend to wear, but I was more than willing to try out this palette - there is something truly beautiful about these shadows. I was shocked by the pigmentation and it's fair to say that a few times, I used more shadow than required. One thing I can praise this palette for is the lack of fallout, which I'm extremely glad of. I've figured out one, simple eye look which requires two shadows from this palette and I receive SO many compliments on, and that is using the white shade (far right) all over the lid and the darkest colour (far left) on the outer corner and slightly into the crease then blend, blend, blend. It's my go-to eye look at the mo!


Covershoot Cosmetics Twist Pot* - this is perhaps one of the most convenient products I have ever owned, and should have owned long before now. Typically, when I remove my nail polish, I use a cotton ball soaked in nail polish remover. Now, I use this twist pot. All you need to do it pop your finger in and twist, as the name would suggest. It removes every trace of nail polish even easier than I thought was possible. I would highly suggest getting one of these because I cannot believe or grasp how easy and quick this little pot is!

For the price, Covershoot Cosmetics have overwhelmed and surprised me. The quality is immense and they have a wide selection of products. I noticed that the products are stocked in Savers, and I couldn't help but notice they have a fan brush, so guess what's on the to-buy list?!

Have you tried Covershoot Cosmetics?


*PR Samples

Monday, 26 September 2016

Glowing On A Budget♥*


Liquid highlighters I adore; how about stick highlighters? I was mega intrigued by these three from Natural Collection* - a blush, bronze and highlight shade, although the blush and bronze shades could be used as highlighters on darker skin tones (and would look gorgeous!)

I was curious to how a stick highlighter would work. How do I apply it? How do I blend it? What if it looks unblended? No need to panic. They are pretty simple to apply, blend and glow with. I swipe some on my cheekbones then use the bottom of my damp beauty sponge (from Primark) to blend it out, look less harsh and help it look more natural. I wouldn't suggest using the bronzer colour for contouring on pale skin because its on the shimmery side and is slightly too warm toned too.


Coral Glow; this is such a beautiful pink and gives the appearance of "natural, flushed and rosy cheeks". It has a hint of shimmer through it which gives a healthy and radiant look. It has a creamy texture which blends effortlessly with a damp makeup sponge. A little goes a long way for this product (as with all the other sticks too) - it's super pigmented.

Rose Glow; Perhaps my favourite of the three. It is an absolutely stunning highlight shade which compliments my skin tone ever so well. It's a unique shade too - I don't have anything else like it. I noticed that it's quite a cool toned highlight also, definitely not on the gold side. Basically it's stunning, shimmery and you need it!

Copper Glow; I reckon it's more ideal for bronzing rather than contouring as it is more on the warm side. It gives a sunkissed glow to make you look as though you've just stepped off the plane after a holiday abroad for a week. Although it is quite shimmery so a little amount is all that's required - don't want to go Oompa Loompa style!

For £1.99, I don't see why these shouldn't be in your makeup collection. I know that some people wouldn't like these due to being quite shimmery but as I have said previously, a little goes a long way.

Have you tried these highlighting sticks? Did you like them?


*PR Sample

Monday, 19 September 2016

The Vivid Lipsticks♥

Lip products were my genuine weakness a few years ago. I couldn't contain myself in Boots or Superdrug - I was guaranteed to leave with at least a lipstick or two (or more!) The pretty packaging, stunning colours and incredible deals were constantly drawing me in. Within my lipstick obsession period, I happened to buy the Maybelline Color Sensational Vivids lipsticks. I was more than willing to try these after hearing about them everywhere.

I guess there must have been a special deal on that I got two - who can resist a tempting buy one get one half price deal?! I settled for 906 Hot Plum and 910 Shocking Coral. Both are ever so slightly out of my comfort zones and aren't ideal for day to day wear, but I make them work, somehow. They are bright and colourful but how could I resist injecting some colour to my makeup look?!

Hot Plum is possibly the brighter, more out-there of the two. The gorgeous colour must have caught my eye. I cannot even explain how vibrant and pigmented this is - honestly, the colour payoff is not even on the scale. The true colour is what you literally see in the bullet - now how often does that occur?! I wouldn't necessarily say it's best suited for any season - it looks fantastic in Autumn and Winter because it's bold but also Spring and Summer because it's bright and colourful.

Shocking Coral, in my opinion, isn't an overwhelming coral. Toned down, it's a beautiful orange-toned pink, but wore normally, it's a bright pink. It is much more wearable for everyday wear as pink tends to be easier to pull off. It doesn't require as much attention to application as Hot Plum as it isn't quite as bold. This is the lipstick out of the two that I am more inclined to using in the Spring and Summer as bright pinks are right up my alley.

These lipsticks as a whole are brilliant quality for their money. At £6.99 each, I find the pigmentation to be out of this world, the colour selection to be vast, the packaging to be sleek yet efficient and the application to be phenomenal. As they are creamy, they apply so well and don't feel drying on the lips at all. I do like when my makeup smells good (none of that chemical smell, no thank you), but these smell super sweet! 

I'm seriously thrilled and smitten with these lipsticks. At the price, I highly suggest you pick one (or two) up - you won't regret it!

Have you ever tried the Maybelline Color Sensational range? Any shades you recommend?

Jasmine♥x

Email : jasminesblog3@gmail.com

Monday, 12 September 2016

Beautiful Brows On A Budget?♥*

There are thousands of brow products on the market nowadays, some more affordable than others. Course, you don't need the highend products for your brows to be perfect. Drugstore products work well enough for me, so I decided to put Natural Collection's Brow Products* to the test!


I used to adore brow pencils when I first got into the brow trend, then I just forgot about them. The Natural Collection Brow Pencils* have changed my view on them. I have both the light brown and medium brown - the light brown is ever so slightly too warm toned for my brows and the medium brown suits my brows much better. Both the pencils are pigmented and are easy to blend if needed. I find it extremely handy that the pencils come with a spoolie on the other end to help you achieve your desired brow shape.


I love the durability of brow kits - you have the wax and powder in one, so it's no surprise I couldn't wait to dive right into the Natural Collection Brow Kit*. Not only does it have a wax and powder, but it comes with a really handy brush and spoolie. The wax is uber pigmented - I was shocked and soon discovered that the smallest amount goes the longest way! Due to the wax being so pigmented, I only need a little bit of powder to fill in the rest of my brows. I use the brush that comes with it, and in actual fact, it's pretty compact and I like it!


Brow mascaras are super efficient for those days where you cannot be bothered with eyebrows - simply brush the product in and voila. Natural Collection's Brush On Brow Gel* is ideal because the wand is so small and precise, you won't be making any brow errors anytime soon. It also brushes on the right amount of product and doesn't go clumpy. It is available in two shades; medium brown and dark brown. The medium brown is quite warm toned whereas the dark brown is more on the cool toned side. For the price of £1.99, I do really recommend these.

It just goes to show that you can achieve beautiful brows whilst being on a budget! Natural Collection are a brand that prove this for sure.

Have you tried Natural Collection's brow range? What were your thoughts on it?

*PR Samples

Monday, 5 September 2016

July 2016 Nailbox♥*

Subscription boxes aren't something I've ever got into before. Sure, I think they're a great idea as you get to try various brands and products before going out and buying a full sized product. When nailbox got in touch about a subscription box dedicated to nail products, I was intrigued. Each month, they send out a themed box including three nail polishes and two nail accessories. I received the July 2016 Paradise themed box.

 Brushworks Toe Separators* - I used to own numerous toe separators a few years back and lost them all so these pink ones shall be replacing them. I don't tend to use toe separators as I rarely paint my toe nails (because nail polish seems to last for about six months on my toes, no clue how), but I do reckon that these may come in handy some how.


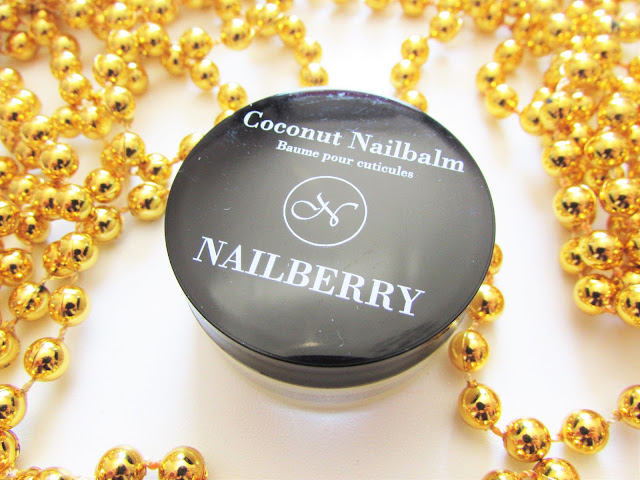
Nailberry Coconut Nail Balm* - I've never, ever tried a nail balm, so when I saw this, I was curious. With it being coconut, I knew it was off to a good start. I soon discovered that you only need a small amount as it is quite greasy. I do like the product but I often forget to use it before painting my nails or going to sleep, but if you're cuticle proud (which I need to become), get this!


Nails inc Soho Place Gel Effect Nail Polish Aqua* - Nail inc is one of those brands I always want to try but it's a little on the pricey side, so when I saw this beauty sitting looking at me when I opened the box, I was delighted. Not only delighted that it was nails inc, but delighted at what a beautiful shade it was too. During the Summer months, I like wearing bright colours on my nails, so this is right up my alley. It reminds me of the sea due to the pretty blue colour and lasts well on the nails.


Angelica Nail Polish in Snow White* - sometimes, I just paint my nails white as it looks sleek, and my reliable white is becoming gloopy, so I was fascinated by this. Although I could use it just as a nail polish, it would be more ideal for French manicures. It isn't gloopy, thankfully, and isn't too watery, therefore it is ideal for using as a block colour, or French tips.


True Brit Nail Polish in The Summer House* - I could not (and still can't) get over how stunning this nail polish was, and the bottle also. The colour is more on the nude side but it looks as thought there is shimmer throughout, but that makes the polish even more gorgeous! Personally, I love this nail polish because it is guaranteed to go with every outfit.

I feel that Nailbox is definitely a good idea, a nail subscription box is rare to come by so I like the idea of this one!

Have you tried Nailbox? 


*PR Samples
All photos are taken and owned by blogsallbeautyy. All opinions are my own.. Powered by Blogger.